Issue
| Info |
|---|
Connection could not be established between a Slave-Board in Linux and a Master in Windows. |
Solution
Please follow the below steps to setup the board in Linux as slave and connect it to a master board in Windows.
...
Connect your master to the slave per Profibus
Switch both on
Setup board as slave in Linux:
Compile the driver as explained in GettingStarted here:
https://kunbus-gmbh.atlassian.net/servicedesk/customer/portal/1/topic/cb393a6c-c5be-4402-81bd-3c01251bda20/article/986939540Press I : Initialize DF PROFI II
Press O : Open communication channel
Press A : Initialize Slave (You will hear a clacking sound)
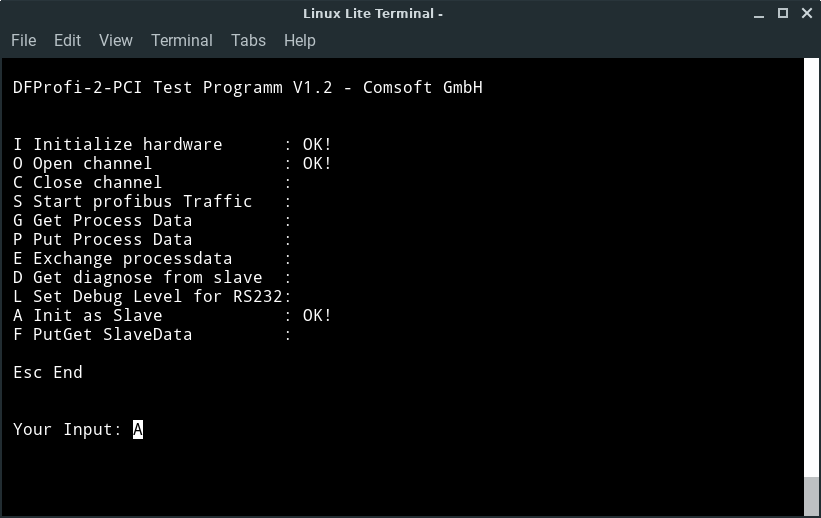
Per default, the slave address of the board is 11 and the baudrate is 1500 kBit/s (6th pos.) ( the coding of the baudrate in the example code equals the ranking of the baudrate list in Configurator III. pp. Step 4.a. )
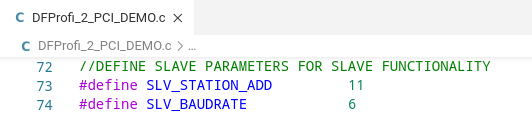
If you wish to change baudrate and slave address, you have to change the defines "SLV_STATION_ADD" and "SLV_BAUDRATE" in the Example.c code and recompile it to get an updated executable.
Setup board as master in Windows with Configurator III:
Create a new configuration with your Profibus-Master module
(e.g. address 1 and baudrate 1500 kBit/s = pos.6 in the list)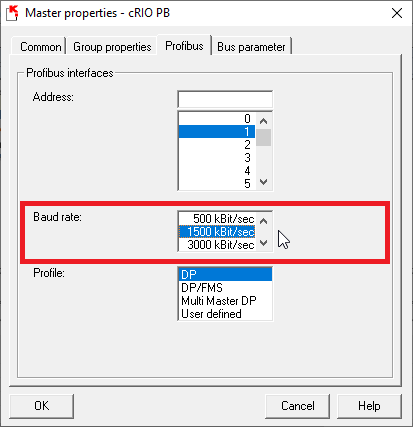
Drag and Drop the slave module in the area to the master (e.g. DF PROFI II DP-Slave)
Add the I/O-configuration to the slave module (e.g. 4byte-in/4byte-out)
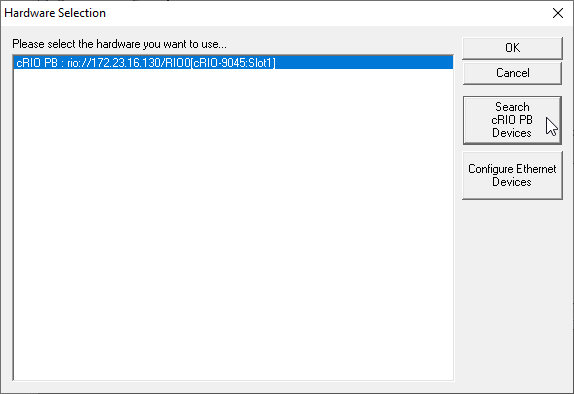
Switch to menu bar -> "Online" -> "Driver selection..." -> Search **** PB Devices --> Choose your Master out of the result list.
Click the "Monitor / Modify connect" icon and save your configuration.
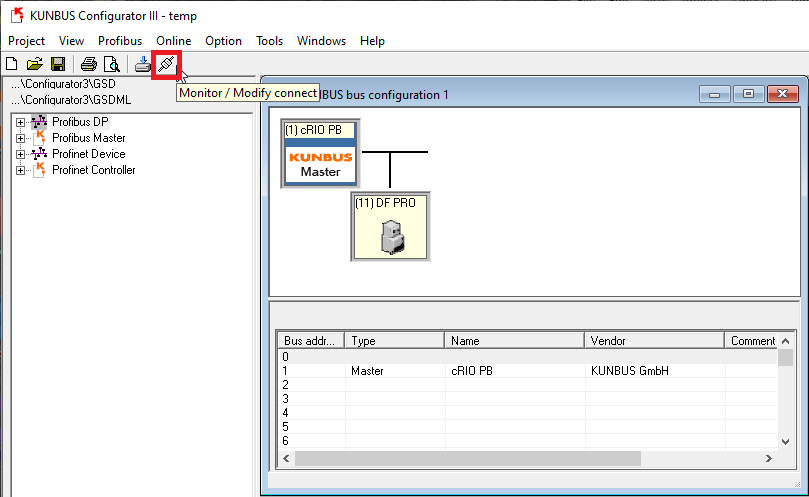
The slave module will now be detected.
Confirm to overwrite the FPGA and confirm the difference (the frame of the slave module in Configurator III turns green and the green and yellow LEDs of the board will turn on).
In case the slave is not reachable it will framed red in Configurator III.
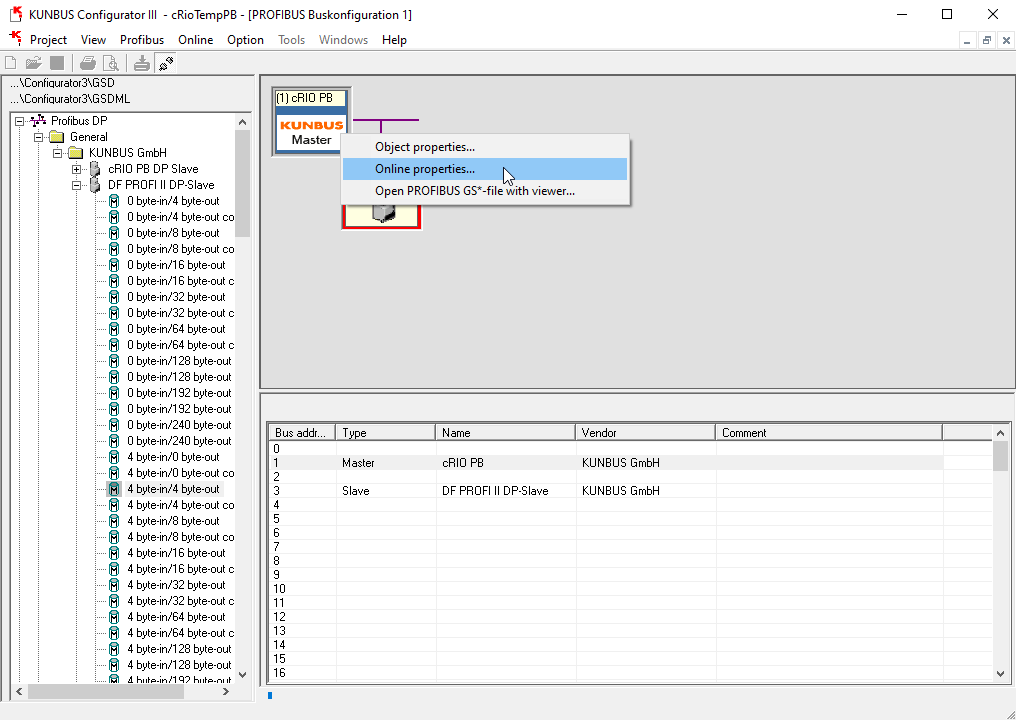
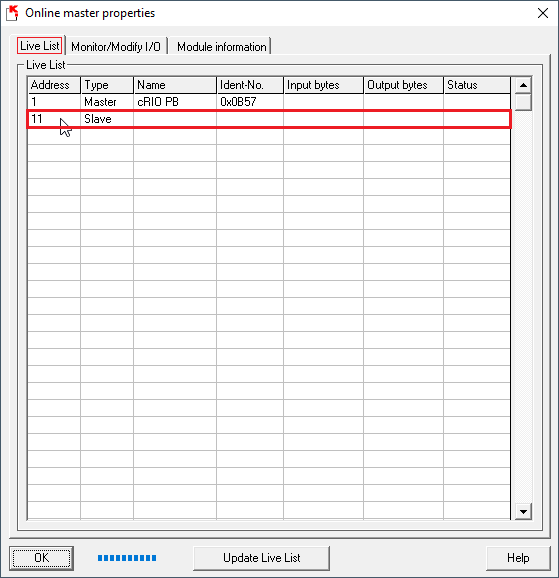
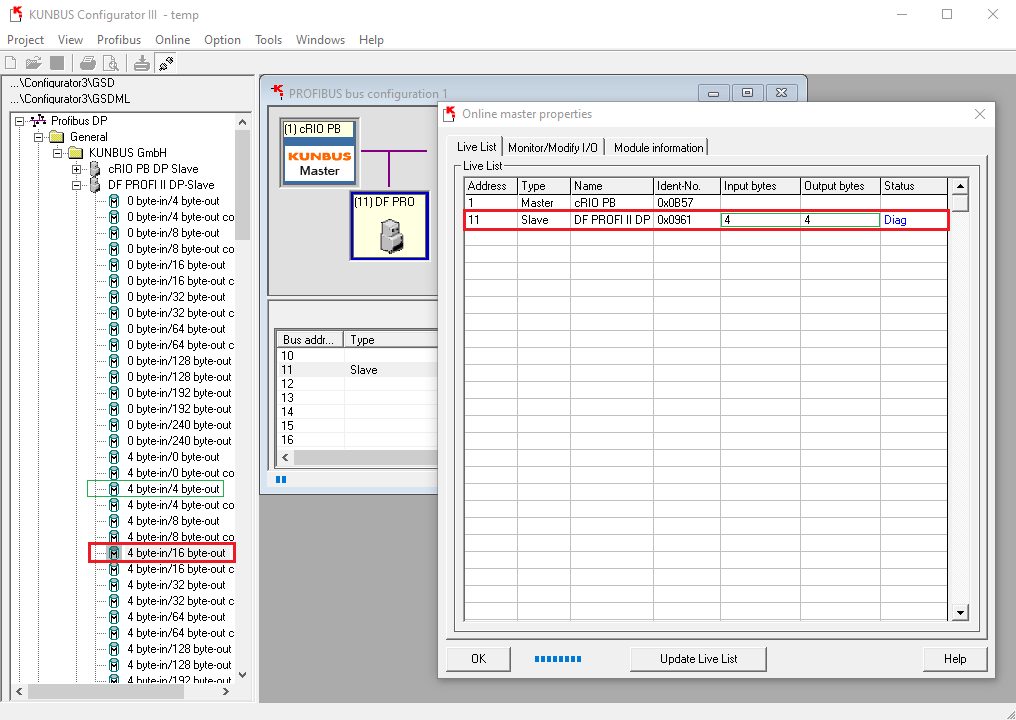
Right click at master -> "Online porperties..." -> "Live List" -> here you can read the address of the slave you have actually connected.

Close this window and deactivate the "Monitor / Modify connect" mode by clicking on the same icon.
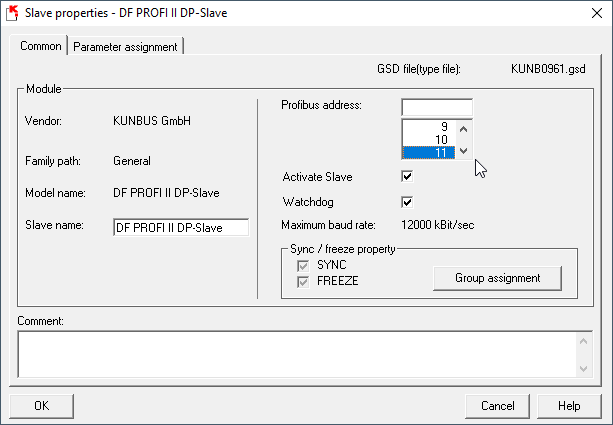
Right click on the slave with the red frame -> Object properties... -> Set the Slave-Address you have read -> confirm with OK.
Click the "Monitor / Modify connect button" -> your Slave module will now be detected.
In case the I/O-configuration of the slave differes from the connected one, it will be shown with a blue frame in Configurator III.
Right click at Master -> "Online properties..." -> in the coloums "Input bytes" and "Output bytes" you can check the I/O-configuration your connected slave actually has.
Close this window.
Deactivate the "Monitor / Modify connect" mode by clicking on the same icon.
Correct the I/O-Configuration of your slave. ( e.g. green configuration in 6.a. )
Click the "Monitor / Modify connect button" -> your slave module will now be detected (green frame in Configurator III or the green and yellow LEDs are on)
Related Articles
| Filter by label (Content by label) | ||||||||||||||||||
|---|---|---|---|---|---|---|---|---|---|---|---|---|---|---|---|---|---|---|
|
| Page Properties | ||
|---|---|---|
| ||
|